Showing posts with label craft-fair-ology. Show all posts

Sunday, April 14, 2013

introducing - craftfairology.com!


Hello crafty friends! I am so excited to announce the beginning of a rockin' new online magazine for indie crafters and makers  - Craftfairology.com

Craft Fair-ology, or CFO for short, will be an expanded version of my weekly column that started right here on Favor the Brave and will cover all aspects of craft fair selling, making, display, and business for the indie artist. 

We are just getting our feet on the ground right now, so things are in the works all over the place, but we want your help! Whether you're a newbie with questions or a seasoned regular with lots of experience, we'd love to have you contribute to the treasure trove of crafty knowledge!

Thursday, April 4, 2013

zeleny!

ecoFB

I had a blast at Zeleny Arts and Craft Fair last weekend in Parkville, MO, just north of Kansas City, and I am so excited to be going to their second show of the season in Springfield, MO this coming weekend! We'll be downtown at the Squidfoo gallery during the First Friday art walk on Friday night and also on Saturday from 10-5. If you're in the area, come see me. Here's the link to the Zeleny Springfield Facebook event.

namebanner

Everything in my booth I made by hand and it was all with recycled materials to boot! It was fun to adapt to a new space (8x8 instead of 10x10) with new work! Beaded jewelry had been my calling card since I started my business in 2005, but I hardly brought any last weekend - such an odd feeling!

bookmountain

ecoFB5

ecoFB6

I hope some of you can come out to Zeleny Springfield this weekend!

Friday, March 29, 2013

craft fair-ology: be your own favorite booth

8368512562_2ba772621d_z

If you're just joining me, this is "Craft Fair-ology," my regular feature on helpful tips and hints for selling handmade goods at craft fairs.

But wait, you don't have to be a craft vendor to learn something useful! I will be mentioning how to apply these tips and techinques for display and storage to other aspects of your life as well... truly win-win! 


wholebooth

One of the best pieces of advice I've ever heard for selling at craft shows is to be the booth you would most want to stop at. The set up pictured above is the booth where I feel like I did that the best. I am drawn to lots of color, but I like for it to have some uniformity - hence the black and white chalkboard theme with the pops of every color of the rainbow!

What you like might be different from what other people like, but it's guaranteed that you will do your best work if you are doing what you love and showing in a way you like instead of copying someone else's style. When you are at craft fairs, take a walk around and note what you like that the other vendors are doing. Make sure you're using them for inspiration rather than directly copying them, because you always want to make sure you make things you're own. When you have a chance, jot down all your ideas and think about what you do with your time and space.

Most of all, be patient with yourself. The most well put together booths didn't happen overnight, and I have spent the better part of 4 years perfecting mine, and I am always improving.

For more craft fair advice, read the rest of my Craft Fair-ology posts.

Dear Readers, Google Reader AND Google Friend Connect are going the way of cassette tapes, so make sure you don't lose your favorite blogs - Especially Favor the Brave, which you can follow on Bloglovin' HERE! Import all your fave blogs from Google Reader to Bloglovin' here.

Friday, March 22, 2013

craft fair-ology: creating versatile space

Dear Readers, Google Reader AND Google Friend Connect are going the way of cassette tapes, so make sure you don't lose your favorite blogs - Especially Favor the Brave, which you can follow on Bloglovin' HERE! Import all your fave blogs from Google Reader to Bloglovin' here.

8368512562_2ba772621d_z

If you're just joining me, this is "Craft Fair-ology," my regular feature on helpful tips and hints for selling handmade goods at craft fairs.

But wait, you don't have to be a craft vendor to learn something useful! I will be mentioning how to apply these tips and techinques for display and storage to other aspects of your life as well... truly win-win! 


2ndsuitcase

One of the best favors you can do yourself as a craft vendor is to create display spaces that can do double or triple duty. The blue suitcase above is one of my favorite examples. The clothespins on the back can hold whatever I need them to - necklaces, earrings, signs, etc. I have divided up the bottom with tins and canisters because they have lids that can be taken off and the items inside can be displayed as is. The other great thing about suitcases that they are easy transportation to and from the show!

clothespins

closeup3

Also, back in the left corner you can see my big black corkboard, which I used with cup hooks from the hardware store to create more versatile space. I use it to hang necklaces, earrings, etc. 

cuphooks

Think about what it is that you sell and what you might like to sell in the future and how those items can best be displayed. Having a good amount of space that can change with your changing inventory will help you be most ready for whatever shows and quick turn arounds might come your way.

Read the rest of my Craft Fair-ology posts for even more ways to use your space and optimize your craft fair performance!

Friday, March 8, 2013

craft fair-ology: up, up, and away!

8368512562_2ba772621d_z

If you're just joining me, this is "Craft Fair-ology," my regular feature on helpful tips and hints for selling handmade goods at craft fairs.

But wait, you don't have to be a craft vendor to learn something useful! I will be mentioning how to apply these tips and techinques for display and storage to other aspects of your life as well... truly win-win! 


booth3
Building up, up, up!

Often you only get 10 ft x 10 ft, 8 ft x 8 ft, or maybe just one table to display all of your hard work. So how do you deal with such intense space constraints? You have only one direction to go - up! 

Think about your favorite little artsy boutique or market. I'll bet you that everything isn't just on one level. There are often tables, things on the floor, dresses hanging just where you can't help but stare at them. The walls themselves are often covered with goodies, right at eye level so they're hard to resist. I have found that one of the keys to creating an interesting display is to use my vertical space as well as my horizontal space.

closeup3

Building yourself a set of mobile craft fair walls or finding another type of backdrop is a good place to start. I try not to take up too much prime table space with signs and decorations, so I usually use those on the walls or on the front of the tables, as you can see in the picture above. Then, by varying the levels of your display pieces with shelves, boxes, and crates, you can help move your customer's eye through your booth, instead of giving them one flat level of displays to look at.

Favoring Brave's Christmas 2012 setup

Go forth and build up! For more craft fair advice, read my other Craft Fair-ology posts.

Friday, February 15, 2013

craft fair-ology: tell your story

8368512562_2ba772621d_z

If you're just joining me, this is "Craft Fair-ology," my regular feature on helpful tips and hints for selling handmade goods at craft fairs.

But wait, you don't have to be a craft vendor to learn something useful! I will be mentioning how to apply these tips and techinques for display and storage to other aspects of your life as well... truly win-win! 

aboutstory

One thing I always bring with me to craft selling venues, no matter how big or small, is my "About" story. A big part of the reason people like to buy hand crafted goods is that they get to see who made it, where it came from, and know the story behind it. Often, though, it can seem pushy for a crafter to launch into their back story the moment a new customer walks by. This sign is my why of opening the door to more conversation with my buyers about what I make and why.  

A lot of people don't see it, a lot don't read it, but those that do often want to talk more about my business, my art, and my goals. Sometimes they want to buy something because they realize the commitment involved in my business.

You know how important it is to have an "About" page on a blog, for your Etsy store, and other web pages, so why should selling in person be any different? Think about what makes you different and help your customers to know why your business matters. It can make all the difference.

aboutstory2

Monday, December 10, 2012

deluxe recap

DSC_0057

I had a blast at Deluxe Indie Craft Bazaar this last weekend in Oklahoma City. There were some awesome booths there, great shoppers, and even a break-dancing competition! Love it! Here are some quick snaps of my booth, which has been taking up every last moment of my time for the last couple weeks. I'm happy with how it turned out! I'll be talking about making some pieces I used in this display on upcoming Craft Fair-ology posts.

DSC_0067

DSC_0063

DSC_0062

DSC_0068

DSC_0061

DSC_0060

DSC_0073

DSC_0065

peace&love,
Jill

Tuesday, November 27, 2012

craft fair-ology: fabric covers for mobile walls

8368512562_2ba772621d_z

If you're just joining me, this is "Craft Fair-ology," my regular feature on helpful tips and hints for selling handmade goods at craft fairs.

But wait, you don't have to be a craft vendor to learn something useful! I will be mentioning how to apply these tips and techinques for display and storage to other aspects of your life as well... truly win-win! 

walls in action2

So last week I shared my method for creating a frame for mobile walls and so this week we will cover the creation of cloth covers to inclose your space.

The covers I'm going to show you are made to fit the specific panels I described last week, so head back to the last one to check those out before you jump in here.

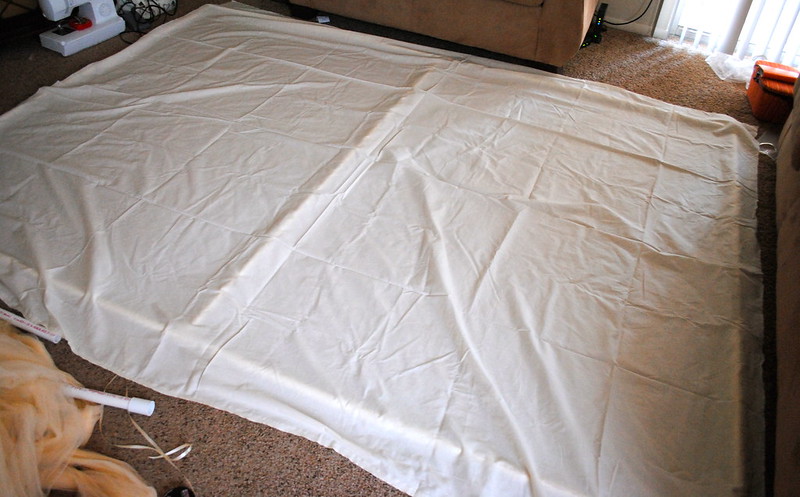
The first thing I did was lay out the back wall piping and cover it with my cloth to make sure that it would cover it completely. I used muslin. For my 8x6 back wall I needed 3 yards of 52inch fabric, and mine cost $10.32 at $3.44/yd.

DSC_0022

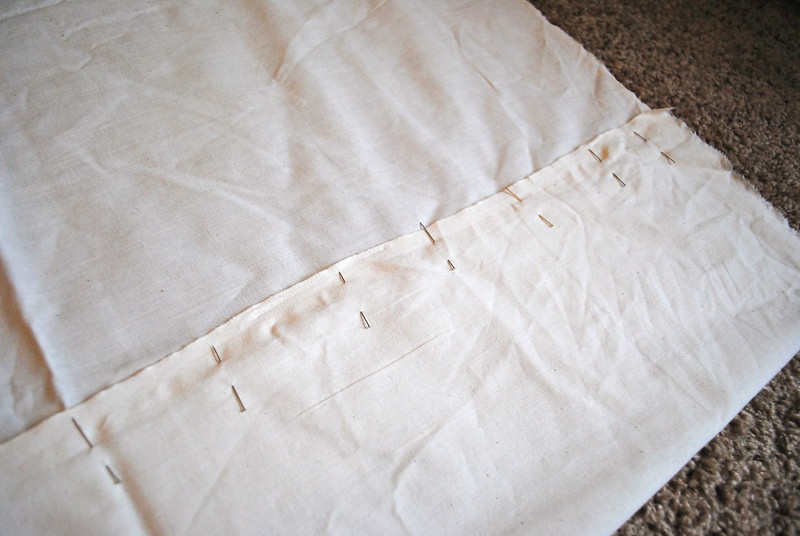
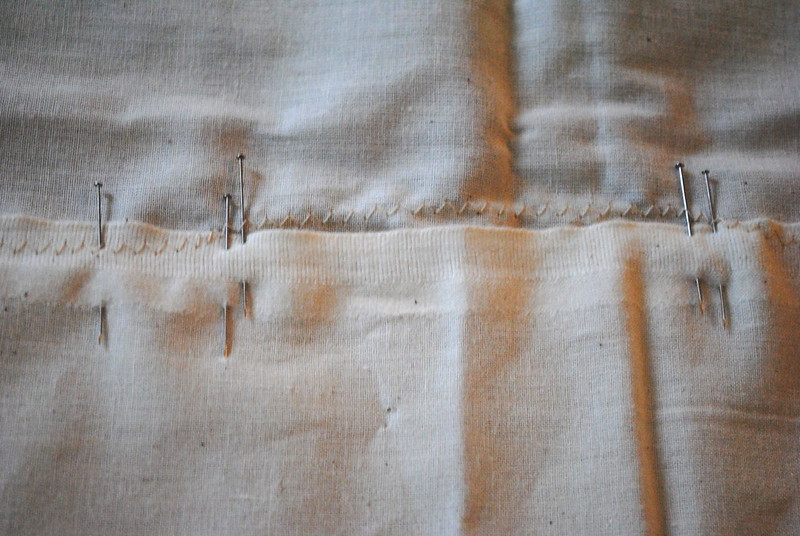
Next I measured it out the same amount of space at the top and the bottom and pinned it up. Trick I learned in costume design: Pin vertically and you can leave your pins in while you sew on the machine, like so:

DSC_0023

Because I have a stabilizing bar running up the middle of the back I needed to have an opening in the hem for that joint. To make sure I knew where to stop sewing on the hem I used two pins close together to show me where the hole was supposed to be, as shown below.

DSC_0026

For the sides I used a more unorthodox technique. I knew that fabric for the whole booth could potentially cost a fortune, but I happened to have a ton of tulle lying around from my wedding and I decided to try something with it.

DSC_0001

Tulle is a great option for walls because it lets light through, it can be very versatile, especially when the colors are neutral like this. First I tried keeping the tulle bunched up and wrapping it around the frame while the frame was attached to the back wall lying on the ground. This is a good option if you have a lot of tulle in one piece, but mine were already cut into pieces, so I took a different approach.

DSC_0005

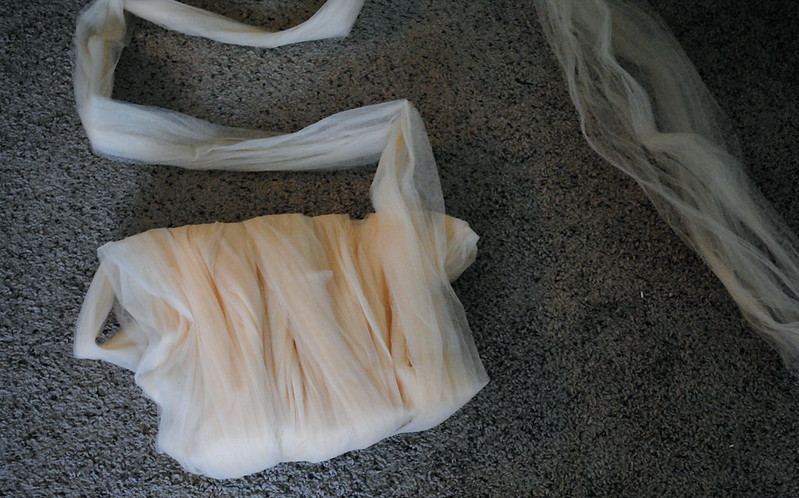
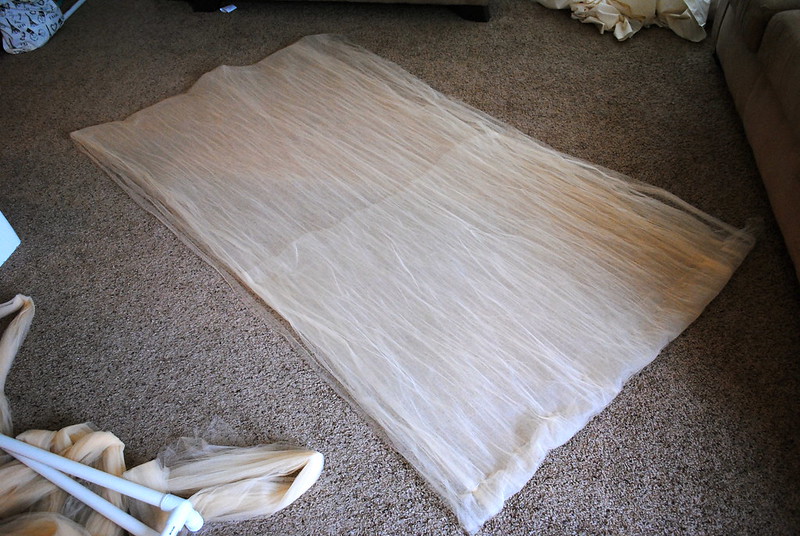
Instead I spread the tulle out completely, which was about exactly the width I needed for the 4ft walls and wrapped it around the frame out flat, as in the picture below:

DSC_0007

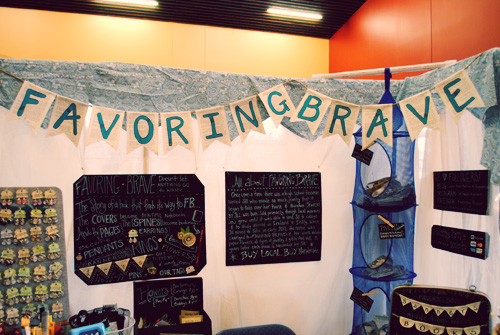
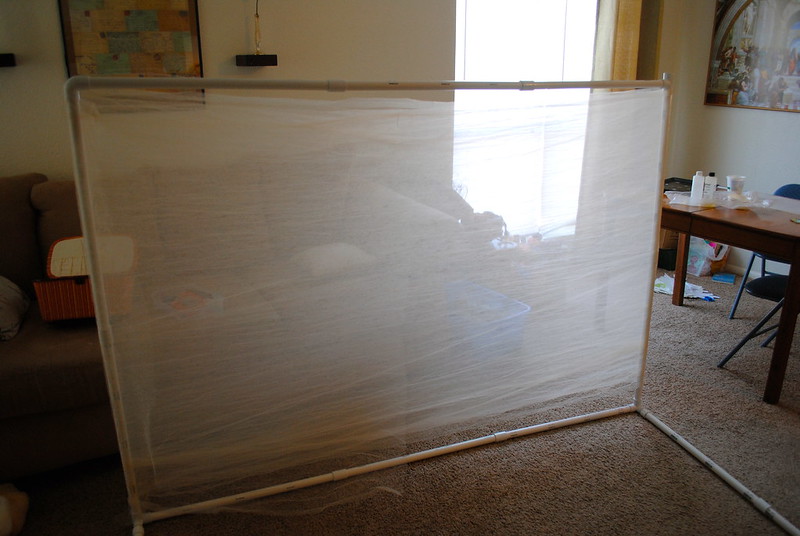
When you stand it up it looks like this!

DSC_0009

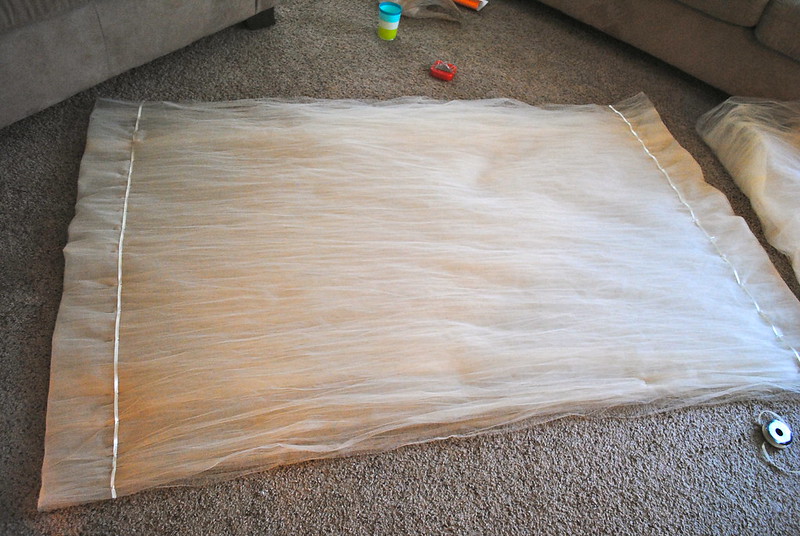
Then I laid it back down, with the back wall on the ground, and pinned up and down along the top and bottom to make sure everything stayed in the right place. Then I carefully removed the end piece so that the fabric was wrapped between two freestanding poles. I gently slid the fabric up off the poles and laid it out on the ground.

DSC_0010

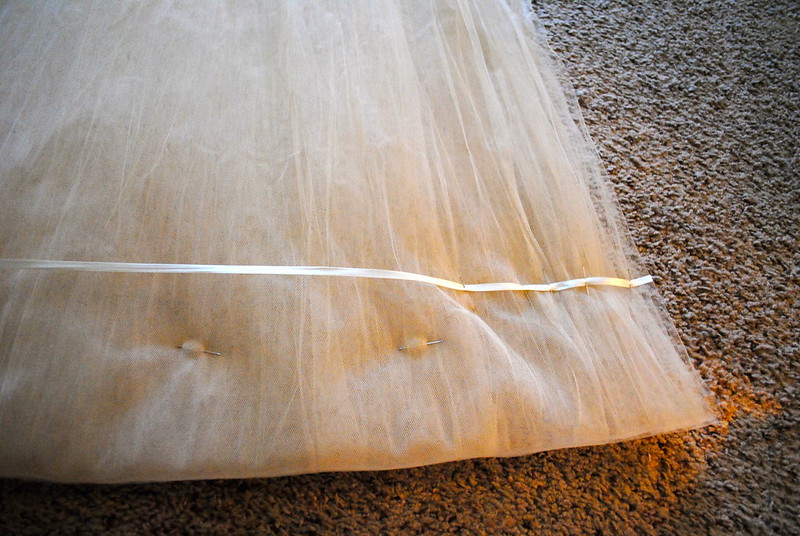
Tulle is very hard to sew by itself, so I chose to add ribbon to make it easier to sew, but you can also sew along a piece of tissue paper if you don't wanted the added embellishment. I pinned the ribbon along the length of the top and bottom to give me a sewing guide.

It's also worth mentioning that I left a LOT of space for my "tubes" at the top and bottom. The bigger the space the easier it is to just slide the pipes into them, and believe me, you don't want to be fighting for every inch getting a pipe through a tight tube when time is of the essence.

DSC_0014

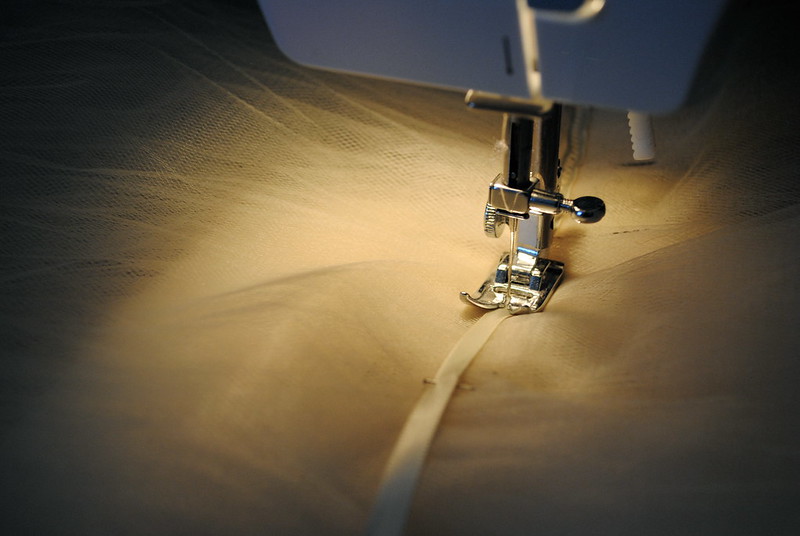
All done and time to sew! Set your machine to a zigzag and get sewing.

DSC_0017

DSC_0019

Repeat for the tops and bottoms of all sides. If you were smart and pinned vertically it all goes quickly, but just make sure and pull them all out!

DSC_0020

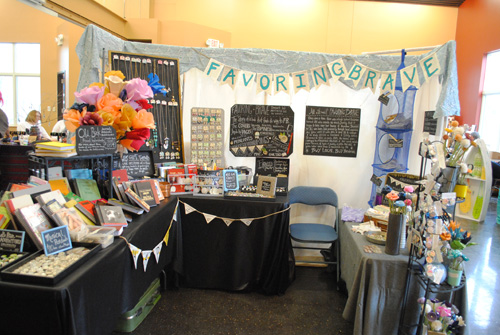
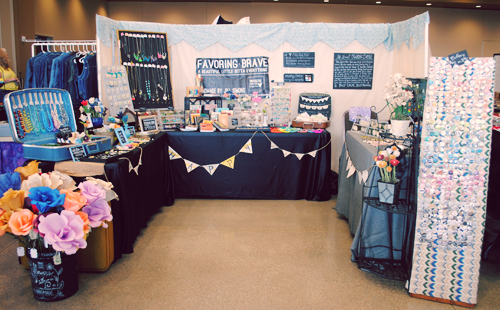
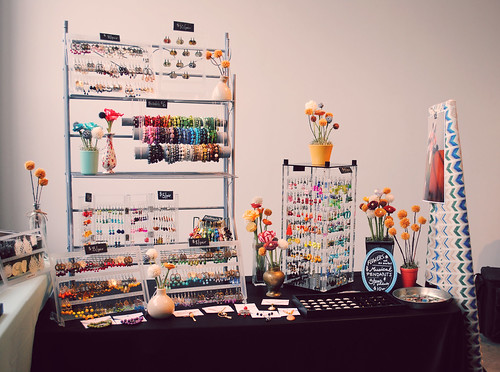
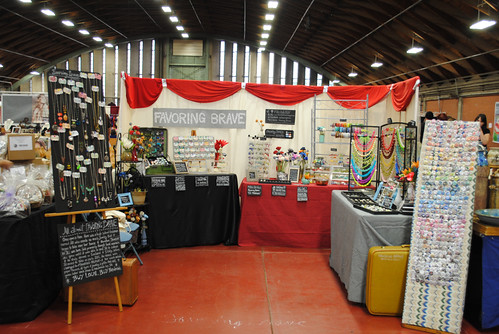
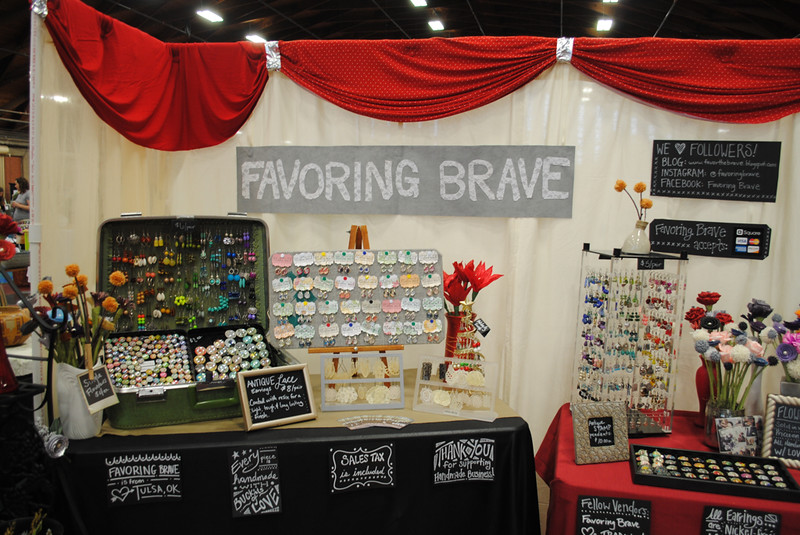
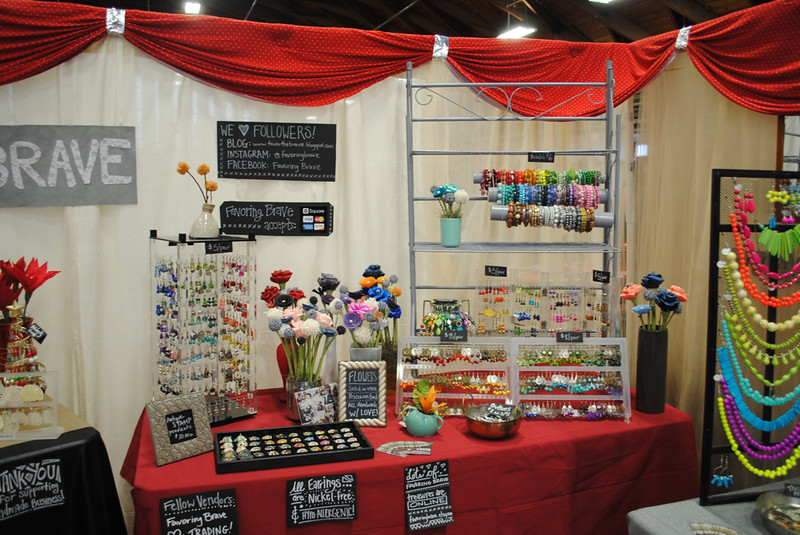
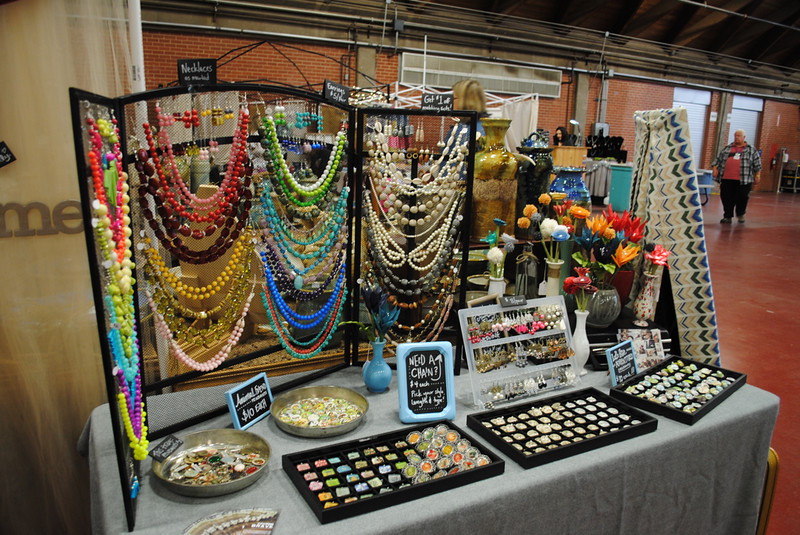
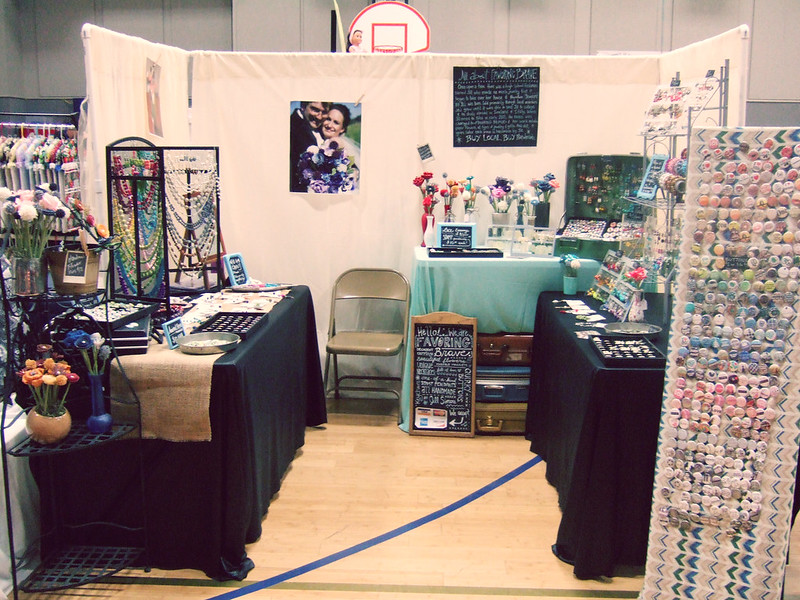
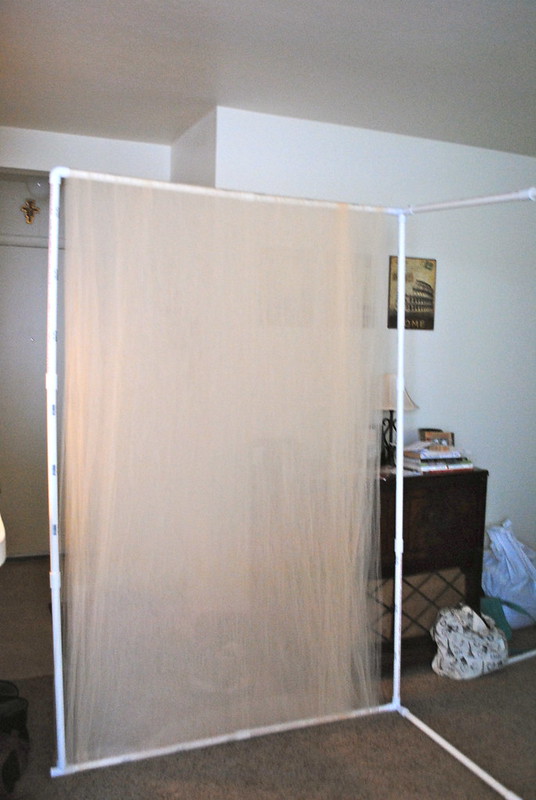
Here is the finished product. The sides are the tulle and the back is the the muslin. Not too shabby, huh? 
 
walls in action2


See you then!

peace&love,
Jill

Related Posts Plugin for WordPress, Blogger...